I apologize, friends.
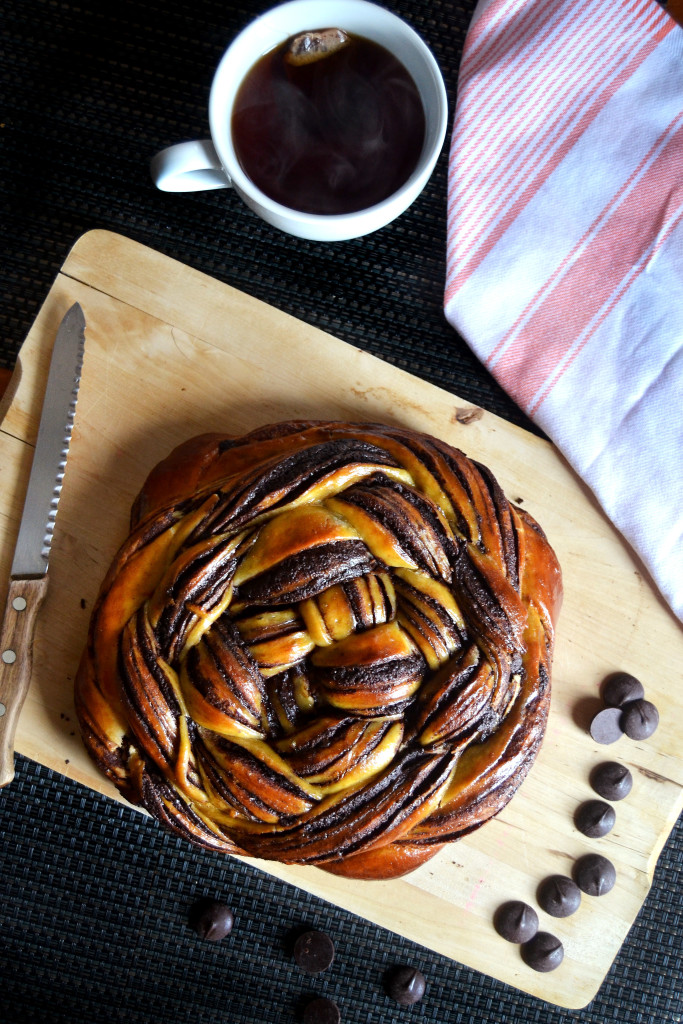
 Because I know you. I know that the knowledge that this challah bread exists will now eat away at you until you get the chance to make it for yourself. (Or at least until you can bribe your roommate/spouse/pet to make it for you so you can shove some in your face.) I know that one look at it already has you itching to get into your kitchen, and scanning the ingredients to see if you could get started on it right away, before any of the day’s other demands can be faced.
And it’s horribly unfair of me to put this upon you, because if you make this challah bread, it will make your kitchen smell like that first fresh cup of orange juice in the morning, mixed with the deep, seducing aroma of blissfully dark chocolate.
It’s awful, really, that shaping this woven loaf is about as much fun as playing with play-doh is to a five-year-old. Not to mention how ridiculously simple it is to throw together – I mean, where’s the challenge when this dough is so wonderfully forgiving? Why even bother!?
I’ll tell you why. Because this challah…it’s something else. Not only is it whimsically beautiful, not only is it fragrant and delicious, but it’s also one of those rare things you can feel really proud of yourself for making. And you’ll probably make it again and again (and again), because you’ll have people pestering you for it again and again (and again).
Even if you don’t consider yourself a baker, this is one loaf you can make easily. The trick here, as with most bread recipes, is patience: yes, it’s an easy recipe and the process is simple, but the dough really does need time to rest to develop its flavor and rise. So this may take two days from start to finish, but you will be rewarded with a loaf that’s way bigger than your head. And isn’t that the dream?
This recipe is sort of a twist on challah bread and babka – I tweaked my go-to recipe for challah bread from Smitten Kitchen (I typically make her apple honey version without the apples when I want a plain challah, always in a round because it’s more fun to shape), and I wanted to figure out how to include chocolate somehow. I noticed Ottolenghi’s method of making a krantz cake in Jerusalem, used by Deb Perelman to make her “better chocolate babka” last fall, was perfect for my purposes.
Challah and babka are very similar, but babka is more brioche-like because of its butter content, while challah is decidedly breadier – though my version is richer than traditional challah because of the extra honey and buttery-chocolate filling. Rolling up the chocolate into two logs then slicing them each in two is what results in the chocolate stripes, and once I realized that was all it took to give chocolate babka its signature swirls, well, it was all down-hill (or up-hill) from there.
A few notes:
If you’re trying to work the resting times around your schedule (the way I’ve scheduled it yields consistent results, but with bread recipes there’s always flexibility), keep the longer resting times before the loaf is shaped. This is because the chocolate filling solidifies as it cools, and when it does, the dough will be constrained by the hardened mass of chocolate swirled throughout it and won’t be able to proof, resulting in a denser crumb. That’s why I have the plain dough rest overnight, and only let the shaped loaf sit for a few hours at room temperature, and let the logs and loaf rest without being refrigerated.
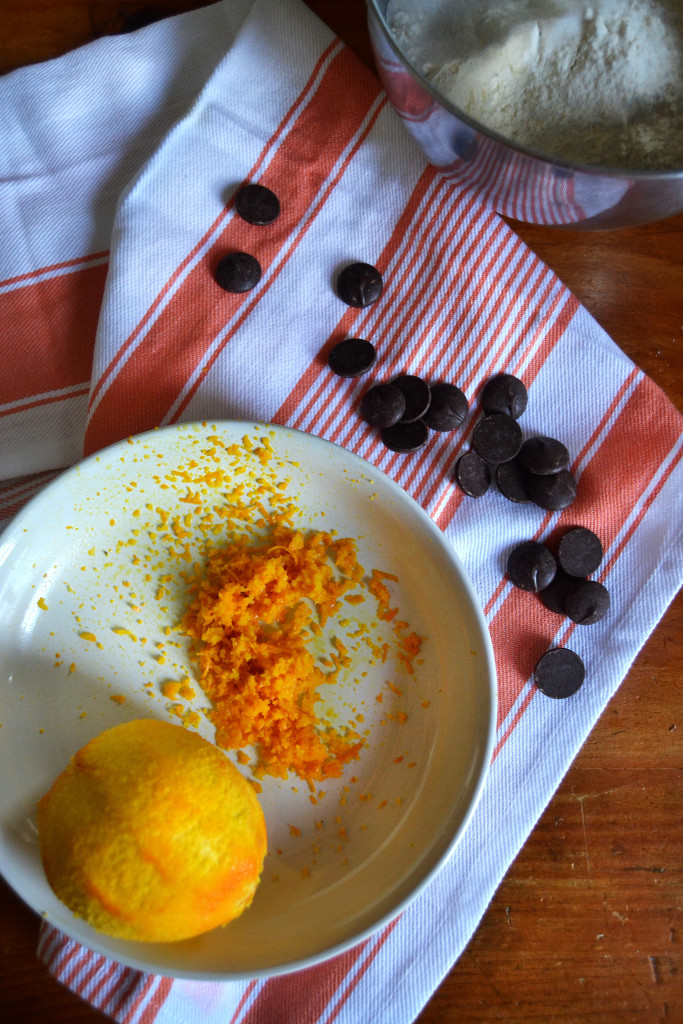
Because yeast loves an acidic environment, I swapped the water in Deb’s recipe for orange juice and added orange zest for a brighter flavor. I also bumped up the honey to balance out the bittersweet chocolate. I think it’s safe to say you’ll be happy with the results.
If you don’t have a mixer, it’s not impossible to do by hand, but because the dough is very sticky it will be challenging. I suggest mixing the ingredients until they come together in a bowl then moving the dough to a floured surface to knead by hand, and then returning the dough to a bowl when it gets too sticky and using a rubber spatula to knead and fold it over itself until it’s smooth, so as not to incorporate too much extra flour into the dough. This method will take longer, but at least it’ll give you a bit of extra arm muscle.
And finally, as Deb mentions in her post, measure the oil out first and then use the same measuring cup for the honey so it slides right out. That tip goes for any oil-honey recipe; it makes life so much less sticky.
Chocolate Orange Challah Bread
by L.
Yields 1 large loaf, adapted from Deb Perelman of Smitten Kitchen and Yotam Ottolenghi’s Jerusalem
For the dough:
3 1/2 teaspoons active dry yeast
1/3 cup + 2 tablespoons orange juice
zest of 1 large orange
1/3 cup olive oil (or vegetable oil) plus more for the bowl
1/2 cup honey
2 eggs + 1 yolk
1 1/2 teaspoons salt
4 1/4 cups all-purpose flour
Flour for dusting
1 egg, for the egg wash
For the filling:
4 1/2 ounces bittersweet chocolate (I used 70%)
4 ounces unsalted butter
1/3 cup granulated sugar
2 Tablespoons cocoa powder
Edit 12/5/15: After a few readers reported that their dough was too dense, I remade this several times and found that dissolving the yeast first resulted in a consistently smooth and sticky dough. I also added a few tablespoons of orange juice and an extra teaspoon of yeast, and found this to result in a more fluffy dough. These changes are already reflected in the recipe.
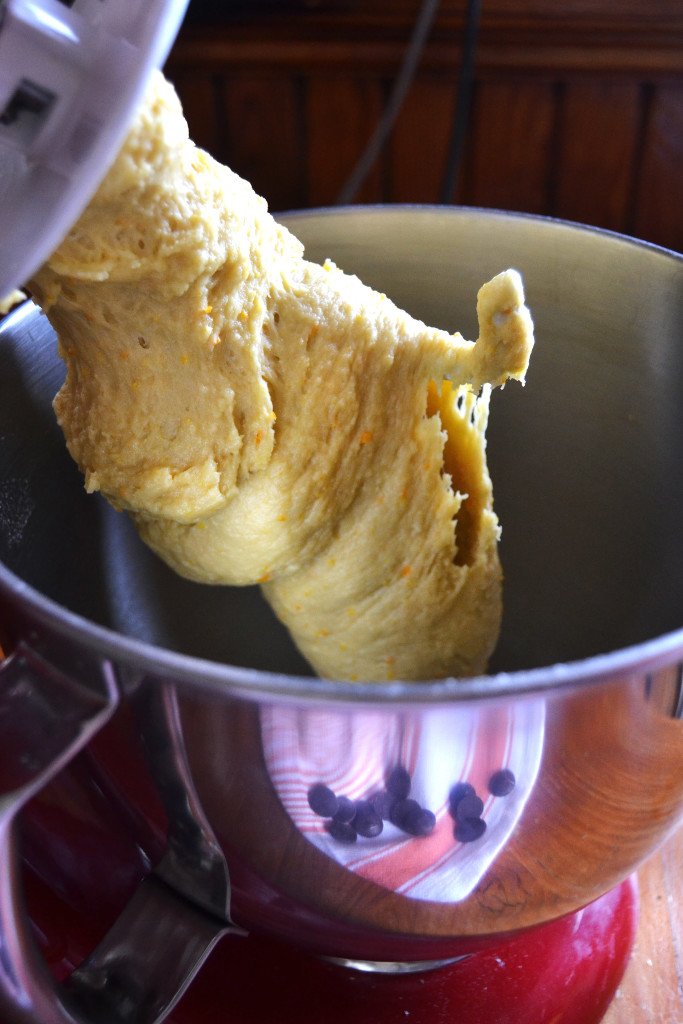
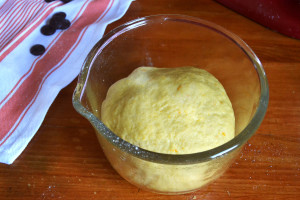
Heat or microwave the orange juice to body temperature. In the bowl of an electric stand mixer, combine the yeast and orange juice and stir to dissolve, then add the honey, zest, oil, and eggs and yolk. In a separate bowl, mix together the salt and flour, then dump this into the mixer and knead for 10-15 minutes on medium speed using the dough hook attachment. At first the dough will be a craggy mass, then it will come together and eventually be smooth and satiny but still sticky. Oil a separate bowl, then transfer the dough to the oiled bowl. It will get less sticky as it rests. Let it sit, covered, for about an hour at room temperature, then stick it in the fridge overnight (anywhere from 8-24 hours, with a longer rest yielding better results – if your kitchen is cold, though, you can get away with letting it rest unrefrigerated, as long as you punch it down every few hours).
The next day, take the dough out, gently press it down and flip it over in its bowl, re-cover, and let it come back to room temperature, which could take 1-3 hours.
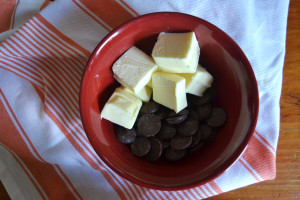
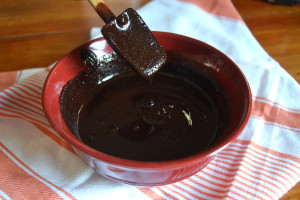
Meanwhile, make the filling. Melt together the butter and bittersweet chocolate, then mix in the granulated sugar and cocoa powder until combined. It should be runny – a little graininess from the sugar is expected. Let it sit at room temperature while you get the dough ready (don’t refrigerate it, it will get too thick to spread).
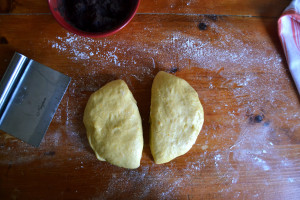
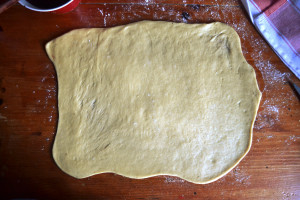
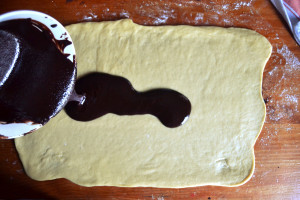
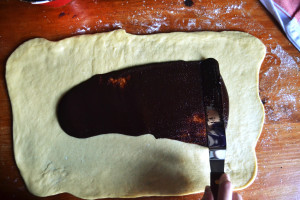
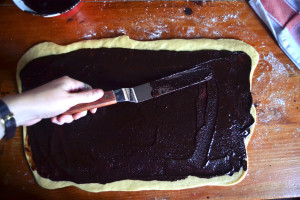
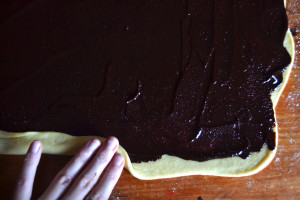
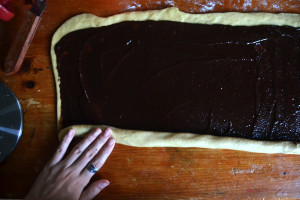
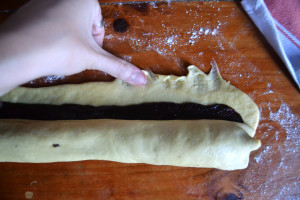
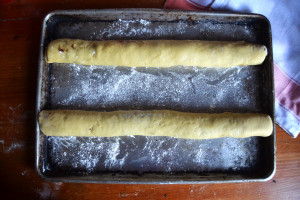
Dump the dough on a lightly floured work surface and divide it into two equal parts. Set one half aside, and gently press or roll the other into a wide rectangle about 15”x10”, and 1/4” thick. It doesn’t have to be perfect. Spread half of the chocolate filling all the way to the sides of the dough on the right and left, but leave a 1/2-1” space on the top and bottom edges. From the bottom edge closest to you, begin rolling up the dough like you would if you were making sticky buns or cinnamon rolls. When you get near the end, wet the top 1/2” of dough and spread it thinly across your work surface – this will make it easier to adhere to the other side of the roll. Roll it up and smooth out the edge, then set aside to rest. Repeat with the other half of the dough, and let these two logs rest for another hour, covered loosely by plastic wrap or a dish towel.
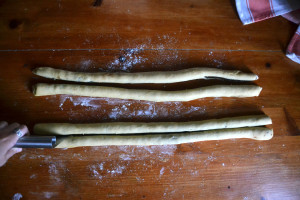
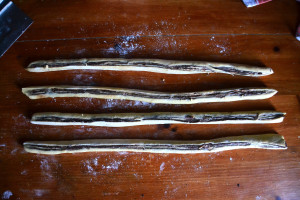
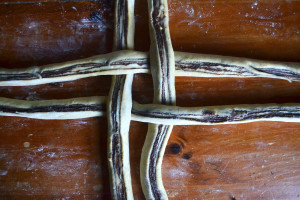
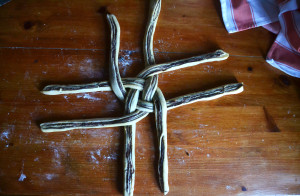
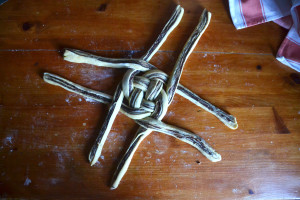
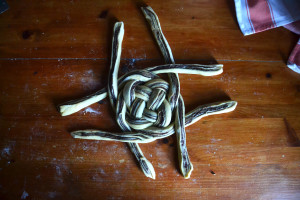
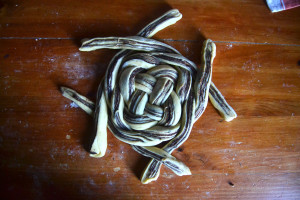
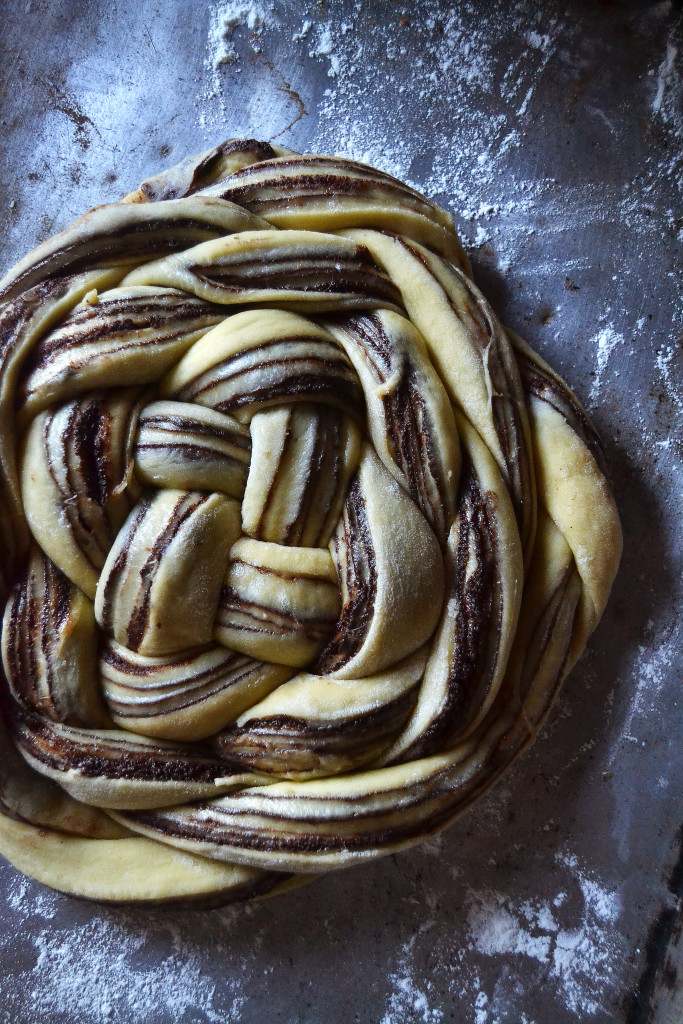
Next, cut each log in half lengthwise, so you’re left with four skinny logs that are striped with chocolate. Now the fun begins! With these chocolate stripes facing up so they’re visible when the bread is baked, make a plus sign with two of the logs. Loosely weave the other two logs into this plus sign. Then, loosely take both ends of one side of the plus sign and cross them over each other. Do this to all sides of the plus sign, then do it again, and again, alternating going over and under, until you’re left with almost a round, then tuck in the ends underneath the loaf. (See the pictures for guidance). Keep it loose enough for the bread to have room to rise in the oven, but not so loose that when you’re done shaping the round there are visible spaces between the strands of dough.
Cover with a towel and let it proof for about two hours. It won’t look much larger, but should have a “puffy” look to it. Brush it with egg wash and let rise for another hour. Pre-heat your oven to 375F, and then brush your loaf again with egg wash before popping it into the oven. Bake for 35-45 minutes, but check on it around the 25-30 minute mark because it may get dark too quickly, in which case you can cover it with foil for the remainder of the cooking time.
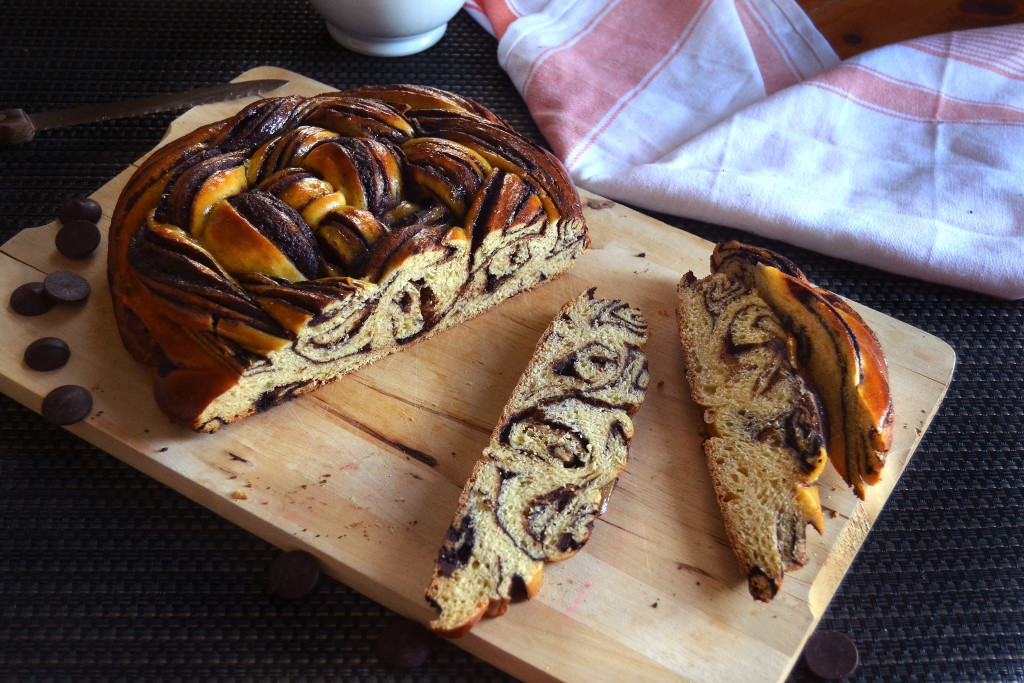
When a thermometer reads an internal temperature of 195F (or when it looks beautifully bronzed and sounds a bit hollow when you tap on it), it’s done. Let it cool completely on a wire rack before cutting into it. Waiting to cut it retains its structure and allows it to stay moist for longer, but that isn’t a problem if you’re going to devour it all right away. So do you.
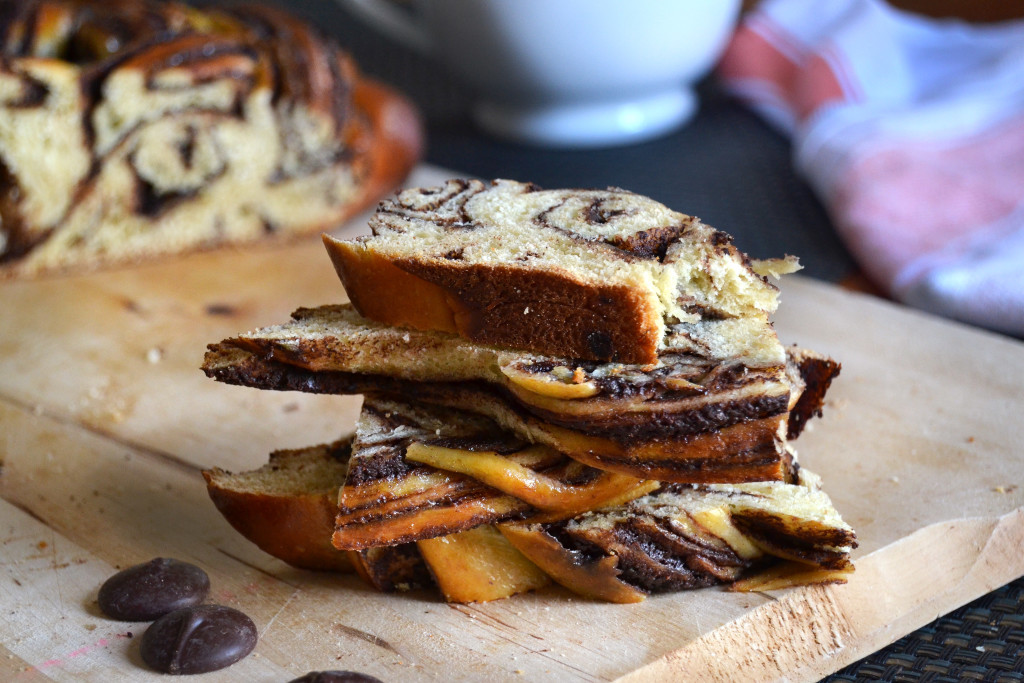
Enjoy with a cup of tea, milk, or snack on it plain in all its chocolate-orange glory. And if you still have leftovers the next day, I guess you’ll just have to french toast it.


Comments
52 responses to “Chocolate Orange Challah Bread”
Hi there! Just saw this and wanted to say that your challah braid is insane! And amazing! And I think I am going to have to get on and try that like asap – chocolate and orange is such a good flavour combination too, and turning it into french toast?! So with you.
Thanks so much! And I can now confirm that this makes some pretty spectacular french toast 😉
Oh my gosh that is such a gorgeous loaf! I must try that braiding technique, it looks a bit more complicated than what I am used to in bread baking but the results are so pretty 🙂 Love the chocolate + orange flavor too!
Thanks June! This braiding technique is actually a lot easier than it looks, and it’s a very forgiving shape. Let us know if you try it out!
I have a bucket list of breads I want to bake and Challah is at the top of it. I decided to go with your recipe and baked this a few days ago. It was a HUGE success!! I hopped around the kitchen when I took it out of the oven. I presented it to everyone like I was showing off a baby or something..haha. I followed everything you said and although I actually had nightmares about the shape I was able to find a video on how to do it and it went smoother than I could ever have imagined. I am a huge fan of chocolate and orange and the flavor was spot on! Honestly, this was just a perfect loaf in every way and can’t thank you enough for posting the recipe and including such wonderful directions!
Thank you!!!!!
Wow thank you, Sonya! I’m so happy to hear that it was a success. I’ll hop on over to your blog and check out that video, I’m sure other people would find it useful too. Shaping this loaf looks way more intimidating in my pictures than it actually is, so thanks for sharing!
If only I could train my pets to make this lovely bread. . .wouldn’t life be so much more delightful?
Regardless this loaf sure is a beauty and I love how you included the step-by-step photos as it gives me the confidence needed to re-create this masterpiece in my own kitchen.
This was too dense for my liking, but the taste wasn’t bad. It didn’t rise as much as I hoped. I am going to look for another recipe. Sorry.
I’m so sorry to hear that, Ariane! But thank you for your feedback, I’ll be making it again in the next few days to double-check the recipe – while it’s not the lightest bread, it should still rise quite a bit. If the recipe stands, a poor rise could also be due to low humidity, kitchen temperature, rising time, the yeast used, or even what country you’re in (U.S. flour typically has a higher gluten percentage). Please feel free to email us if you are thinking about trying it again, we’d be more than happy to help!
I live in Belgium, so I suppose the flour could be somewhat different, however, I don’t think it was the flour, but one of the other variables that you’ve mentioned could have been the culprit. My husband also complained of a strange nutty taste. I thought that that might of have been from the chocolate; not sure.
The instructions aren’t clear whether the dough should be covered or not for all the rises as there are a lot of rises. Is it supposed to be covered when in the refrigerator? I assumed it should be. Is it supposed to be covered after the first egg wash while resting?
I will try the recipe again, however, my husband wants the chocolate omitted. I was really just searching for an orange challah (challah with orange zest) recipe and I found your recipe and fell in love with the look of your challah and decided to try it.
I will be making it again, but with some adjustments. I was thinking about replacing the oil with butter and using regular sugar in place of honey. Thoughts?
Happy to hear you’ll be trying it again!
While I’ve never tried it with this recipe, I don’t see why you can’t replace the oil and honey. I recommend using about 1/2 cup of sugar to replace the 1/3 cup of honey, because honey is slightly sweeter than sugar. (I would mix the sugar and the orange zest together before adding them to the other ingredients, it will help bring out the oils from the zest.) For the butter, I would follow the instructions until after you’ve added the flour and mixed it until it just forms a messy dough (having left out the oil, of course), and then add 1/3 cup of softened butter (about 6 tablespoons) in small pieces. Then continue to the next step of kneading for 10-15 minutes, scraping down the bowl so all the butter is incorporated into the dough.
The dough should be covered in the refrigerator, yes. I also covered the dough loosely with plastic wrap during every other rise, except when it is egg washed. Whether you cover it or not at that stage is really up to you; it won’t affect the finished product. I’ll clarify this in the instructions, thanks for pointing that out!
If you can get your hands on high gluten flour or bread flour, you may have better results. I would also try increasing the amount of yeast slightly (up to 3 teaspoons) to see if that counteracts whatever variable is slowing its rise.
Hope this helps, let me know if you have any other questions!
Thanks so much. I will be starting the second attempt this Sunday; tomorrow. I am going to allow the dough to proof longer in the refrigerator too.
Hope it works out! Another reader mentioned having a similar problem (dense dough), so I’m thinking temperature is the culprit. I just remade the recipe and it worked for me, though I did end up letting my dough rise a little longer to account for the colder/dryer weather. So I think allowing the dough to proof at room temperature or in a warmer area (instead of the refrigerator) might give you better results. Let me know how it goes!
I just tried to make this dough using the recipe as written and it was very dry and dense, not at all sticky and then smooth as you mention. Looking back at the Smitten Kitchen recipe you linked to for a comparison, the yeast is first dissolved in 2/3 cup of warm water (which is not mentioned in your recipe). Could this be the problem? I did not use any water in my dough as it is not called for as written. It might be helpful to amateur bakers to add this step if necessary. Thanks!
Hi Amy,
I’m so sorry to hear it didn’t work out. Another reader had a similar problem, so right now my best guess is that it has to do with our varying environments – temperature, humidity, flour, etc.. If you find yourself having a very dry dough, then increasing the amount of liquid as it’s initially mixing is a good idea – the flour and/or air may just have particularly low moisture. I always skip the step that says to proof the yeast first because it’s really only there to make sure the yeast is working, so as long as the yeast hasn’t expired, I don’t bother. But I think you’re onto something: warming the orange juice slightly and using it to dissolve the yeast may give the yeast the jump start it needs before adding the other ingredients. Thanks for the input, I’ll add a note in the recipe!
I am making your beautiful bread as a late Christmas gift. I am, at the moment, up to rolling and filling it.
Although you have modified your recipe because others seem to not have gotten an adequate rise, I am finding that I wish I had used an osmototolerant yeast such as SAF Gold. I was tempted to but I’ve substituted it before and had things over proof on me. In this case, I think it would have been the right choice so I’ll suggest it and see if you think it could improve others’ results.
In any case, when I saw your braiding technique I couldn’t wait to try it and I look forward to doing it again with the SAF Gold.
I forgot to say congrats on such an inspiring and seductive loaf and thanks ever so much for the very helpful pix.
Thanks Rainey! And if you do try it with an osmotolerant yeast, let us know how it works out. I think it could help those having rising issues, so thank you for the suggestion!
I just made a double batch. As I thought it would be too much for my KA stand mixer I did it by hand. I found it very easy to do with a Polish (or Danish) whisk. It was delightful to knead. My hands smelled luscious and it was only a little sticky for the first 5 minutes or so.
For 2 loaves I used 1 tablespoon + 1 teaspoon of regular SAF Red instant yeast plus 1 tablespoon of SAF Gold osmotolerant yeast. It rose beautifully! I think I’d go about half and half again as it was sufficient and there’s no reason to push it to over proof.
For the filling I added some brownie crumbs per David Leibovitz’ technique. http://www.davidlebovitz.com/2016/02/chocolate-babka-kranz-bread-recipe/
Two loaves just barely fit on my largest flat cookie sheet and thank god for the 36″ oven!
Happy New Year! I have been dying to make this beautiful loaf since I first came across your recipe. I finally baked it today (after starting it yesterday) for New Years Day breakfast. I though it was absolutely wonderful and it was a huge hit with everyone in my family. Thank you so much for sharing the recipe and the beautiful pictures to inspire the attempt! My dough was a little dry and not quite smooth enough, so I ended up adding a little more orange juice than called for (it’s cold and the heat’s been on, so everything is just super dry and requires a little extra love), and it turned out great. Thanks again for posting! I will absolutely be adding this recipe to my list of favorite festive and gift breads!
I’m so happy to hear that, thank you Norah!
Hi! I have made this dough twice. The first time, it didn’t rise. I speculated I killed my yeast with OJ that was too hot, so I tried again. I definitely didn’t kill the yeast the second time and I made sure to dissolve it, per your instructions. Both times, the dough was very dry and required a few tablespoons of water to come together. It is VERY dense and almost impossible to knead by hand. My dough doesn’t look anything like yours and it isn’t rising. You said it wasn’t impossible to do this by hand, but do you think that could be the problem? Is there a way to save my second batch of dough? Appreciate any guidance. 🙂
Hi Suzie, I’m really sorry it didn’t work out for you, and I hope I’m not too late to help! I don’t think it has to do with doing it by hand; it’s more likely that several other factors are working against you. It could be temperature, humidity, or just the subtle differences between our ingredients and techniques. What type of yeast are you using? There seems to be a mix of reviews here and some people have experienced what you’re describing, so I suggest playing with both the dough’s moisture level and its rise. I would try using a full 2/3 cups of orange juice (making sure to only warm it slightly) and increase the yeast to 2 tablespoons for more oomph, then let the dough rise in a warmer area rather than the refrigerator. If none of those adjustments work, let me know and I’ll try to find a better solution!
And if you still have that second batch of dough, there’s not much you can do beyond slowly trying to incorporate more OJ a little at a time. Because you’re doing this by hand, I’d say it’s probably easiest to just start over. Please let me know if you do try it again, and if you have any other questions!
Hi Suzie-
I made it twice too. The first time I made it with conventional yeast and formed my dough in a stand mixer. For that batch I had to add additional liquid too. It rose but not vigorously and I had to give it plenty of time. …which is not a bad thing because it can develop additional flavor but it can also make you doubt yourself. Just be sure to watch your dough, not the clock.
For the second batch I used half conventional yeast and half a yeast specially adapted for sweet doughs (which can be touchier). I did that dough by hand and got a looser dough that came together beautifully during kneading. I would really recommend trying to find a yeast that’s osmotolerant. SAF Gold is the brand that I’m familiar with but other things may be available in your area. Remember, the internet is your friend! ????
Sugar is notorious for zapping up all the moisture and not leaving much available to the grains and the yeast. Meanwhile it can also turn doughs into hyperactive 4yos that operate at top speed until they collapse. Those are the issues that osmotolerant yeasts are designed to control. So it’s worth searching down.
I haven’t actually tasted any of Chocolate Orange Challahs I’ve done but I was delighted with how they looked and the people I gifted them with LOVED them. And I believe them because my hands smelled so good from working with the dough. So I think this recipe is well worth working through. I’m also going to get around one day to experimenting by un-sweetening the dough and filling it with tomato pesto and pine nuts. For that, I’d use conventional yeast.
Hi yinandyolk and rainey,
Thank you guys for your help! Good news! I successfully made a loaf of chocolate orange challah bread. 🙂
I did have a significant difference in ingredients that I totally forgot to mention. I am sensitive to the taste of eggs and always use an egg replacer. I don’t usually have issues and it is such a normal part of my life that it totally slipped my mind.
So, here are the adjustments I made:
• I used real eggs. 2 of them.
• I used 1/4 cup sugar instead of a 1/2 cup of honey (I only had raw honey on hand, which is really expensive, and I just couldn’t bare to waste anymore. 🙁 ).
• 2 tsp salt
• 1/4 cup olive oil
• I did some reading about environment variables in yeast baking. I think my apartment was too cold, so I turned the oven on to warm things up.
• I proofed 2 tsp of yeast in a cup of water.
• I was meticulous about proofing. I even checked the temperature of my water.
• I added a tsp of sugar to the yeast during proofing per recommendations of the manufacturer (Fleischmann’s). Turns out yeast needs sugar. I’m learning, obviously.
• When it was time for the dough to rise, I turned my oven off and put the dough inside (advise from my mom).
• Because I didn’t have the OJ, I wanted a little more orange flavor. So, I added candied orange peels to the chocolate. I made these after juicing the oranges for the OJ in the previous batches of dough.
The bread is delicious. I was worried that after adding the candied orange peels this would pack a very sweet punch. The flavors are delicate, and maybe even a little subtle, which for me, is perfect.
This took a bit of work, but I am really thankful for the learning experience. We can’t know what we don’t know and you guys inspired me to figure out what I don’t know. (And, gave me a homework assignment: osmotolerant yeast). 🙂
Thanks so much!
-Suzie
I am doing this. But I’ve had problems.
My Kitchen Aide was banging the top of the counter, I added more oj. I had to keep pushing the dough down the side and I don’t think the hook was kneading the way yours looked. It did rise not double.
I believe too much chocolate caused it to seep out where it could. It was a mess on the counter. Maybe it should have stiffened a bit first.
It would be helpful to know if the baking sheet should be oiled or use parchment.
I would use parchment paper, I’ll add that to the instructions, thanks for pointing that out. And I’m so sorry to hear that you had trouble with the recipe; I’m curious to know how it turned out. After adding more OJ, was the dough still very stiff or had it loosened up? Did you let the dough rise at room temperature or in the refrigerator? What type of chocolate did you use? I’d love to help you make this successfully, it’s one of my all time favorites. Some other commenters who had similar problems have chimed in with tips that may help you should you decide to try it again. And of course I’m always here to answer any questions!
Thanks so much for the great pictures. I was looking for a fun, new shape. I’ve never done the “tic tac toe” before! Also, thanks for pointing out that forming a loaf with chocolate filling and putting it in the refrigerator overnight wouldn’t work since the chocolate would harden and not allow the dough to rise. You saved me from an epic fail that would have ended up in the trash. I also found all the comments and replies interesting and helpful. (especially people combining both SAF red and gold – I’ve done it since it makes sense, but I never knew if it was the correct thing to do.) One question: What is the purpose for an egg wash after 2 hours, waiting another hour, another egg wash, more rise, and then bake….? Why not just let it rise all the way and put on a couple of layers of egg wash, if necessary, before baking?
Oops, second question: I turned to bread baking for health reason as I can’t always get to the kitchen so flexible rising times occasionally still lets me feel productive. I’m not really a novice any more, but I’m certainly not an expert. So finally my general question (s), if you don’t mind since you obviously know what you are doing…. Can any dough be given a long 8 – 24 hours rise to increase flavor? How long is too long? Will dough sour? I’m assuming a first rise can be extended, but a second rise really can’t be as it will fall in the oven. Is that also correct?
I would love to test things like one recipe with Gold and one with Red yeast, but my health barely allows me to get to the kitchen to make single recipes. 🙂 Thanks so very much for the recipe and all the time you put into sharing it. It is very appreciated.
Hi Suzanne!
Thanks for all your kind words.
As far as the egg wash goes, allowing the first egg wash to “dry” on the loaf before adding another layer means that you’ll end up with a thicker layer of egg wash than if you had just applied multiple layers at once. This step comes from Deb Perelman at Smitten Kitchen, who got it from Joan Nathan’s cookbook. You could just do two layers at once, but it won’t be as beautifully bronzed and its crust will have a thinner, softer texture. I prefer challah bread with thicker skin, but it’s not at all mandatory.
And concerning the rise, you’re right, you don’t want it to over-proof or else it will fall in the oven (or it will deflate when you score the loaf, assuming we’re not discussing solely challah bread). However the time at which this happens depends on a lot of different variables. For example, some types of yeast will rise very quickly, meaning the yeast will eat through all of its food and over-proof quickly. This is why instant yeast doesn’t yield the best flavor – the dough doesn’t ferment enough before it’s ready to bake. On the other hand, if you were to use a sourdough starter rather than commercial yeast, it would likely ferment at a slower pace so you could leave it for longer rises. Temperature also plays a huge role here – you probably know that warm doughs rise more quickly, and that leaving your dough in the fridge will allow you to leave it alone for more time.
When I make a sourdough loaf, for example, I typically let the dough rise for 12 hours or more in a cool spot or in the fridge, then turn it over and warm it back up as I let it rise a second time for 3-4 hours, pre-shape it and let it proof for another hour or two depending on how it looks, then shape it, proof it for an hour, then bake. So that’s about four rises in 18 hours or more. If you’re not making sourdough bread and you allow a dough to rise for this long, it will be a bit sour, yes. But it’s unlikely that a dough that hasn’t yet over-proofed would taste too sour to eat. (I could go on about the role of pre-ferments and bulk fermentation in dictating the sourness of the dough, but I’ll spare you. If anyone is curious they can email me; I’d be happy to elaborate).
So if you need to slow your dough down, stay away from instant yeast (or use less of whatever yeast you are using) and don’t let the dough warm up until you’re ready to shape and bake. Keep in mind that a large batch of dough will take longer to warm up, and therefore require more time to ferment. If you’re trying to get the best flavor, then yes, generally speaking the longer the rise the better. However there’s no hard and fast rule that says that the first rise can be extended and a second cannot; a dough could have three or four rises depending on how often it is turned or “punched down”. Every dough is different, so it’s best to use your baker’s intuition. And if your dough does look over-proofed, either before or after you’ve shaped it, you can punch it down again and reshape. I wouldn’t do this more than once (and I wouldn’t do it with this challah loaf), but this would allow the yeast in the dough to have access to more food and give it a chance to rise again, this time only until you bake it.
I hope this helps, Suzanne. If you have any other questions, let me know!
(And if you’re interested, I also love The Fresh Loaf and Breaddit for their communities of very helpful bread bakers who really know their stuff.)
My chocolate ever set up and I have a wet chocolate mess that poured out all over the place. Was that 4 Oz by weight or liquid on the butter?
I’m sorry to hear that it didn’t work for you, Oda. I measured the butter as 4 oz by weight before melting it down. If that’s what you did and the chocolate mixture is still too wet, it could be that it was too warm – try refrigerating it to let it thicken. I hope you try it again! I’m here if you have any other questions 🙂
Thanks. Yes I’m going to try again with cooling the chocolate a bit. It was ugly but delicuous!
Hello,
I live in southern California (humidity 80%, temp 50F tonight). I can relate to many of the comments left here. I made the dough tonight and it came out very dense and almost tough (unlike any other dough I’ve made). My kitchen aid could not handle the kneading for more than 5 minutes. I have the dough in the fridge now, but am wondering if I should leave it on the counter over night since it looks like it might not make it anyway. Could it be the acid in the OJ? I warmed it to the usual temp for yeast 110-120. Was that too hot? Should I add more instant yeast (what I used for the first round) in case I killed the first batch? It foamed up great at first. Maybe more liquid is needed? Also, most other challah recipes say to add the flour a small amount at a time, and to add the salt after the first few cups of flour. hmmmm…
Thanks… just want to get it right. looks so yummy)…
alison
I’m so sorry it didn’t rise for you, Alison! I hope I’m not too late to help. I would definitely leave it out in your kitchen, especially if you’re already having rising issues. The acid in the OJ is actually helpful for yeast, so it could be that it was too hot – yeast starts to die at 120 degrees. At this point, I can’t do much for your current batch of dough – I would just try to keep it in a warm spot rather than the fridge, give it some extra rising time, and try to bake it off as directed. You never know, it could surprise you with a great oven spring.
But if you make the dough again, I would add more liquid while the dough is mixing, a tablespoon at a time until the dough is soft and pliable, and only warm the OJ to body temperature. Also, add an extra teaspoon or so of instant yeast. (If you want to add the flour a small amount at a time as you described, you can – it shouldn’t change anything, but it would still ensure that the salt doesn’t come in direct contact with your yeast.) Then I would leave the dough out rather than refrigerate it, and give it some extra rising time if it still seems to be having trouble. The humidity in your area is perfect for proofing dough, so all you really have to do is make your yeast is happy.
Let me know if you have any other questions, I’d be happy to help!
Thanks so much! You’re very kind. I did end up adding more water and yeast that night, and left it out to rise overnight. It did seem to rise by the next morning. My next issue was that the curst of the bread overcooked, yet didn’t come to the right temp in the middle. Next time I’ll try with a baking stone? Also, the chocolate melted and burned on the outside. I think I’ll try a lower over temp. Thank you thank you!!
Hi Alison-
I’m also in SoCal and I’ve made this several times now with great success. I even did a double batch of it that was too big for the stand mixer so I did it by hand with a Polish bread whisk. Worked great!
I don’t think the OJ creates a problem. I think the trickiest part is dealing with the sugar in the dough which is why I’ve recommended a specialty yeast for sweet doughs. However, the first time I made it I did it as described with conventional yeast. Although the dough was thicker than described and I felt I needed to add some water and had to give it plenty of time to rise, both the flavor and texture were excellent.
I wonder if you developed a lot of gluten over kneading it in the machine.
In any case, don’t panic. Carry on and I bet you’ll get something special. Don’t rush the rise. A slow rise is where all the wonderful homemade flavor comes from. And next time, give yourself some insurance by getting a specialty yeast such as SAF Gold.
This recipe is well worth working out as nothing’s prettier and it has a punch of citrus and chocolate that makes it much more than just visual treat.
So amazing! Thank you for sharing. I just bought SAF Gold Instant yeast and wanted to try it with a sweet bread. I found this recipe and had to try it. AMAZING!!!!! I did double the orange zest, but WOW! PERFECT! and I can do so much with this. My family will not stop begging me to make again.
Thanks, Erin! I’m so happy to hear that you and your family liked it!
I attempted to make this challah today for our Hanukkah celebration. I make challah all the time and wanted to mix things up. I started yesterday with the dough and it did all the proper rising. The cooking did not go so well. At 20 minutes I covered it so it wouldn’t brown to much as suggested. At 35 minutes I checked it and it was looking ok, but the very center was clearly still raw, sticky, gooey dough. At 40 minutes I smelled the burning and the bottom was completely black but the center still not cooked. Very sad, as this isn’t a fast recipe and it was looking so pretty. Any thoughts as to why it wouldn’t cook properly? I’m in the midwest and I checked that my oven temp was correct.
I tried making this challah for our Hanukkah celebration today. I make challah all the time and wanted to mix things up a bit. I started making the dough yesterday and it did all it’s rising perfectly. The braid looked great, but the cooking failed. As suggested I checked at 20 minutes to cover with foil in order to prevent from getting to dark. At 35 minutes I looked and while the edge clearly were cooking great the center was completely raw, sticky, gooey dough. At 40 minutes I smelled burning and the entire bottom went black while the center still was not cooked. I was crushed. I live in the midwest and checked the temperature of my oven so I can’t figure out why it wouldn’t cook properly. Any thoughts would be appreciated.
Hi Courtney,
I’m sorry this happened to you, I know how frustrating that can be. I would have said that the oven temperature was too high, but if you checked the temp then all that I can think of is that your oven has some areas that are hotter than others. What kind of oven do you have? And what kind of sheetpan did you use? Could it be that your oven thermometer is broken? You could try baking at a slightly lower temp and see if that helps. If those variables aren’t to blame, perhaps the dough wasn’t warmed up enough before baking. I’m sorry I can’t be of more help, and I do hope you try this again with better results! Please let me know if you have any other questions.
I have made this recipe many time with the Smitten Kitchen recipe, but never breaded it this way. How! I love this idea. Can’t wait to try it.
Hi
This was my first time making challah, although I have a good amount of experience baking other types of breads.
For me, the flavor is spot-on. Perfect amount of orange flavor, not overly sweet, and the chocolate was just right. However, it came out very dense, like a lot of the other folks that posted have stated, and by the time the center was fully done, the outer edges were too crisp and dry despite wrapping it in foil. So as I see it, the way the ingredients are listed in this recipe sets a lot of people up for failure. There is no possible way that the amount of liquid called for will make that much flour form a wet and sticky dough. I doubled the amount of orange juice and still needed to add more while it was mixing. I think that this recipe needs to be reviewed and revised so that more people can enjoy making this bread because if done correctly, it’s outstanding. I will definitely make this again, but will do some more tweaking to get the texture right.
Great recipe, just one thing: When I first tried the recipe my dough was way too dense, didn’t rise at all. I reduced the flour to 3 1/2 cups and it was perfection the second time!!
I have some experience baking and this is the first time I am hesitant about a recipe. I should have followed my instinct. The bread came out dense even though I tried tweaking the recipe a bit to improve it. Pretty bad recipe overall this one of yours, nice pictures though
I make challah every week so I made a few adjustments and make this in my normal style and it turned out perfectly. I did a regular four strand braid rather than the circle one because that’s primarily a new years thing.
I first mixed the warm orange juice, yeast, and honey and let it sit for 10 mins before adding the rest of the ingredients. I eyeballed the flour till it was the right consistency and I think I ended up adding around 3.5 cups). Then I put the greased dough ball covered by a towel in the oven which was off but had been on warm/hold for about 10 mins. I let it rise for 2 hrs.
After that i added the filling and put it back in the warm oven for another 45 min rise. I took it out, heated my oven to 425 and baked to for 30 mins.
Part of the reason all of my times may have been so much shorter is that i’m at a high altitude, but either way thanks for the recipe!
I tried this yesterday. I combined OJ, yeast, and honey for 10 minutes before adding everything else. Added about 3.5 cups of flour and dough rose beautifully (2 Tbsp yeast and 2/3 cup warmed OJ). I live in colorado so added just a touch more OJ for the dryness. No issues. First rise in oven with bot of boiled water below it. (Tori Avery suggestion works great). Formed dough and filling (added 2 tsp OJ to filling). Spread beautifully. Let logs sit wrapped for an hour. Braided and let sit for 45 minutes and then egg wash and let sit until oven got to temp. Everything other than baking went beautifully. It burned but I am going to do at lower temp this time. (Did at 400 being at colorado but just too hot). Husband loved taste and we cut off burned part but I have to get this right. Thanks for the recipe.
Oops sorry forgot to mention I never did cold rise.
First rise: 2 hours
Second rise: 1 hour
Third rise: 45 minutes
Fourth rise: until oven heated up
I’m so excited to try this! But I have a question – do you use the juice of the actual orange you’ve zested or do you use store bought orange juice? Thanks!
I’ve tried making this recipe twice. (Mind you, I found it through delish.com for the first making so your tips were not included but same everything else including pics.) The first time, it didn’t rise at all and was super dense (but tasty). I just assumed that the yeast I used was old. So I’m trying it again with fresh yeast and so far getting the same result (letting it rise longer in a warm place to see if that helps at all but 2 hours in and no rise at all). Not sure what is going wrong. I don’t think I’m going to try a third time as I’m so disappointed with the results.
I found this and thought about making this for a week before deciding to make it. The pictures are beautiful and the directions for braiding very much appreciated. I made the dough yesterday for a Christmas dinner. I should have stopped adding flour at 3 cups instead of 4 1/4c. For most of the year I make 25 loaves of bread a week, so not new to working with yeast or bread. With so little liquid in the recipe, 3c of flour would have more than sufficed with the enriched dough. It smelled wonderful and I really wanted this to work. But, with the dough was like a solid brick after sufficient raise time, with a dried out playdough consistency. I just couldn’t justify wasting additional ingredients and, more importantly, time to finish the bread. I was expecting a dough, so enriched, to be the texture of a brioche or challah – light, fluffy, fragrant, and very easy to work with. I wrestled with it to roll out the first half whereas a challah dough nearly rolls itself out. I’m out of oranges, so I’ll have to find something else to make. Sorry, I really wanted this work. I might try it again the next time I buy oranges and be more mindful and careful with the flour.